How to reconnect Airtable to PowerImporter
2024 Airtable API key deprecation
Reconnect Airtable and PowerImporter
DO YOU NEED TO RECONNECT AIRTABLE TO POWERIMPORTER?
You will need to reconnect Airtable to PowerImporter if you have used an Airtable API key when you set up your Airtable to Webflow workflow in PowerImporter.
You do not need to reconnect Airtable to PowerImporter if:
- you have used the OAuth connection method
- you have used a Personal Access Token
- you are creating a new workflow in Powerimporter
If you are unsure which connection method you have used, we strongly recommend that you reconnect. This won't affect your syncs, even if you are using the auto-sync functionality, and will only take a few minutes.
You can also read this information from Airtable: https://support.airtable.com/docs/airtable-api-key-deprecation-notice
WHEN DO YOU NEED TO RECONNECT?
You will need to reconnect before February 1st 2024 to avoid any disruption in your data syncing.
You can make these changes after February 1st 2024, but your PowerImporter workflow will cease syncing your data from that date until the reconnection is completed.
HOW DO YOU RECONNECT AIRTABLE TO POWERIMPORTER?
Please follow the steps below to reconnect Airtable to PowerImporter - you only need to do this once, but for each Airtable workflow.
STEP 1 LOG INTO POWERIMPORTER
- Log into your PowerImporter account here: https://app.powerimporter.com/users/sign_in
- Your workflow(s) will appear as below (you might have just one, or several)
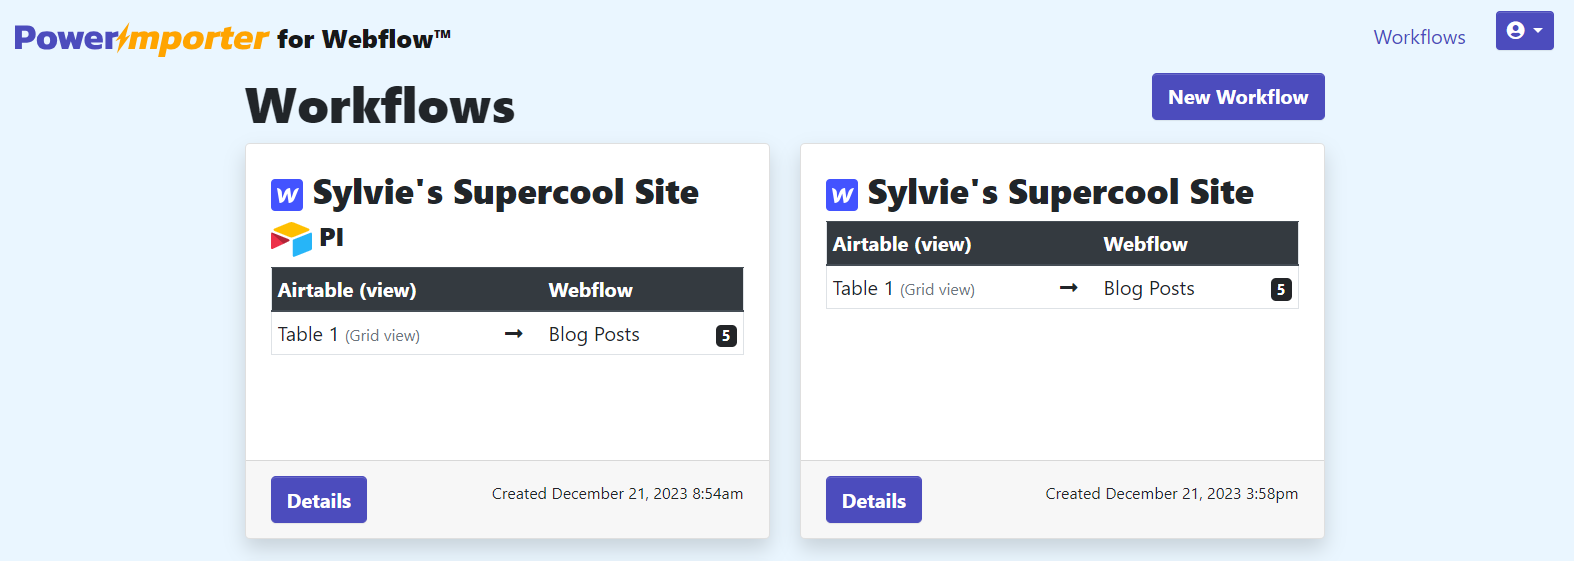
STEP 2 ACCESS YOUR WORKFLOW(S) WITH AN AIRTABLE CONNECTION
- Click on "Details" for each workflow with an Airtable connection (with the Airtable icon).
- The detail of your selected workflow will appear as below:
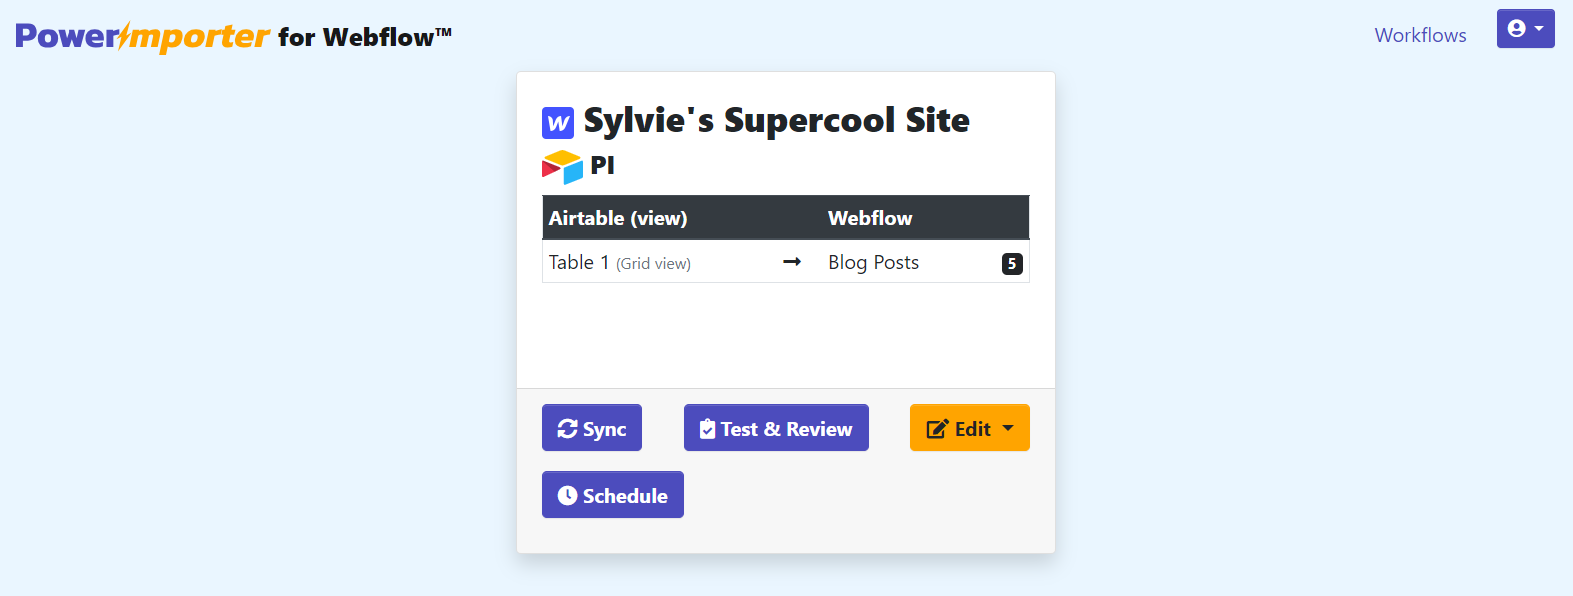
- Click on "Edit" then select "2. Airtable API"
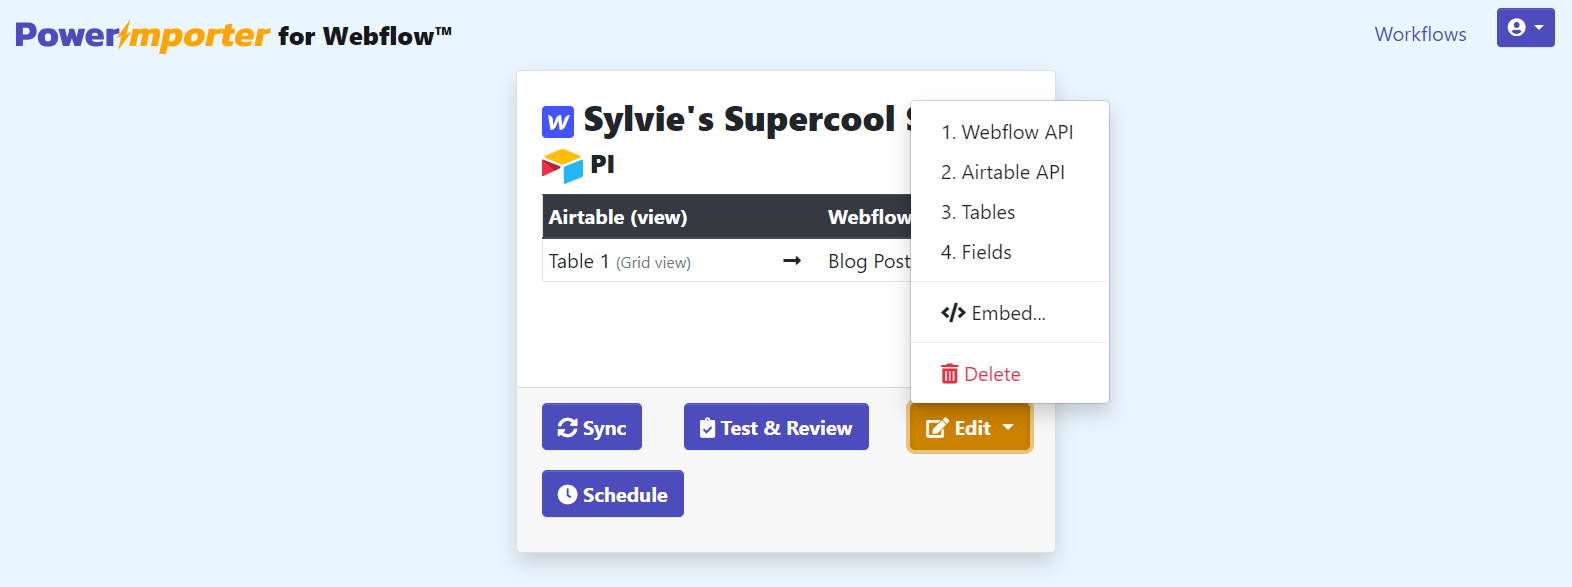
You will be taken to the Airtable connection page and your current Airtable base name will appear - please make a note of the base name as you will need to select it once again after reconnecting Airtable:
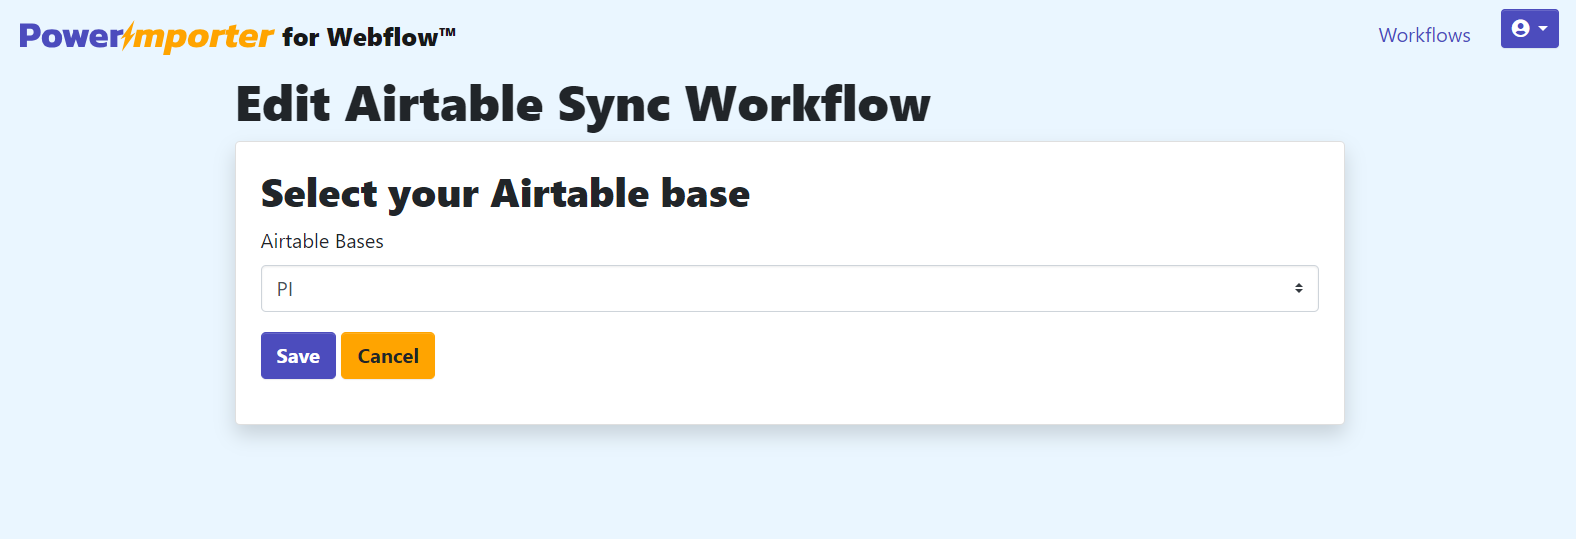
Click on "Add new Airtable token":

STEP 3 RECONNECT TO AIRTABLE
You can connect your Airtable base in two ways:
1 Login to Airtable (recommended) or
2 Airtable Personal access token
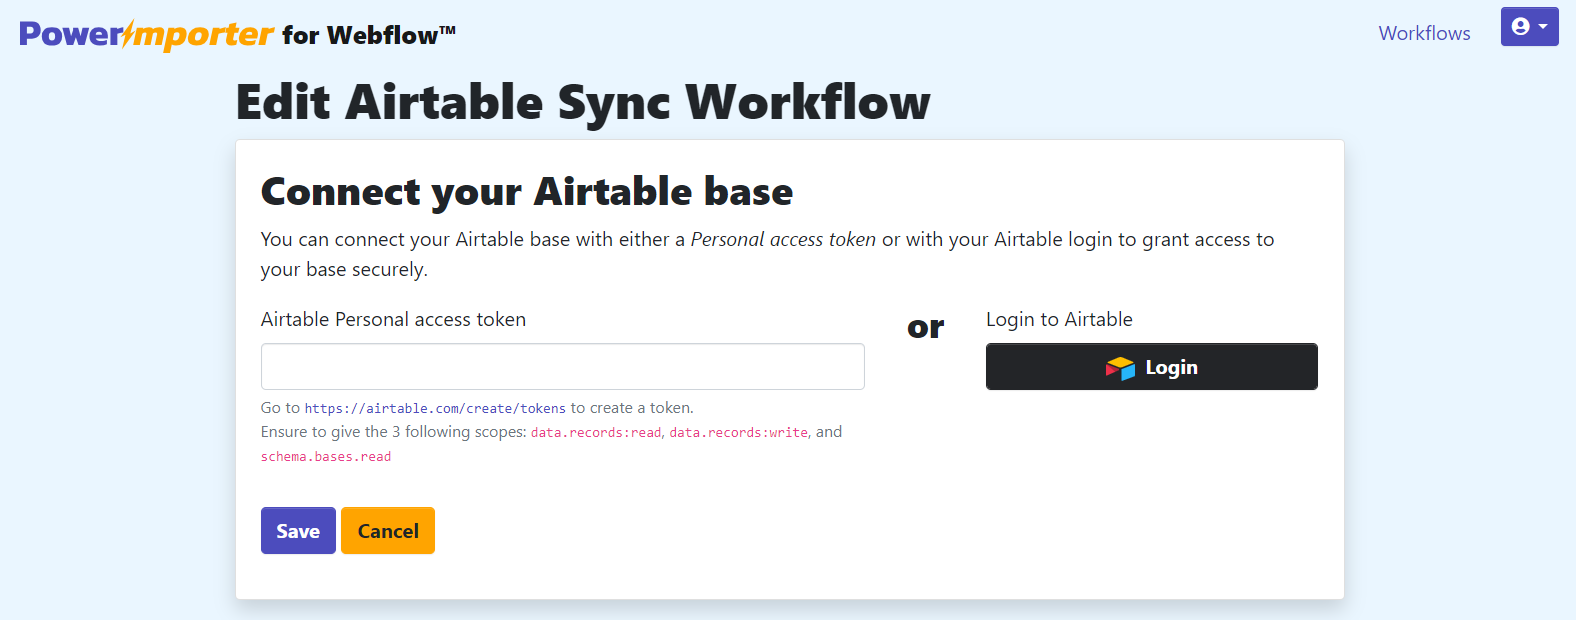
METHOD 1. LOGIN - RECOMMENDED
- By clicking on "Login". This is the OAuth process, which we recommend as it is the easiest.
- Click on "Add a base" and select the base you want to connect with PowerImporter
- Click on "Grant access".
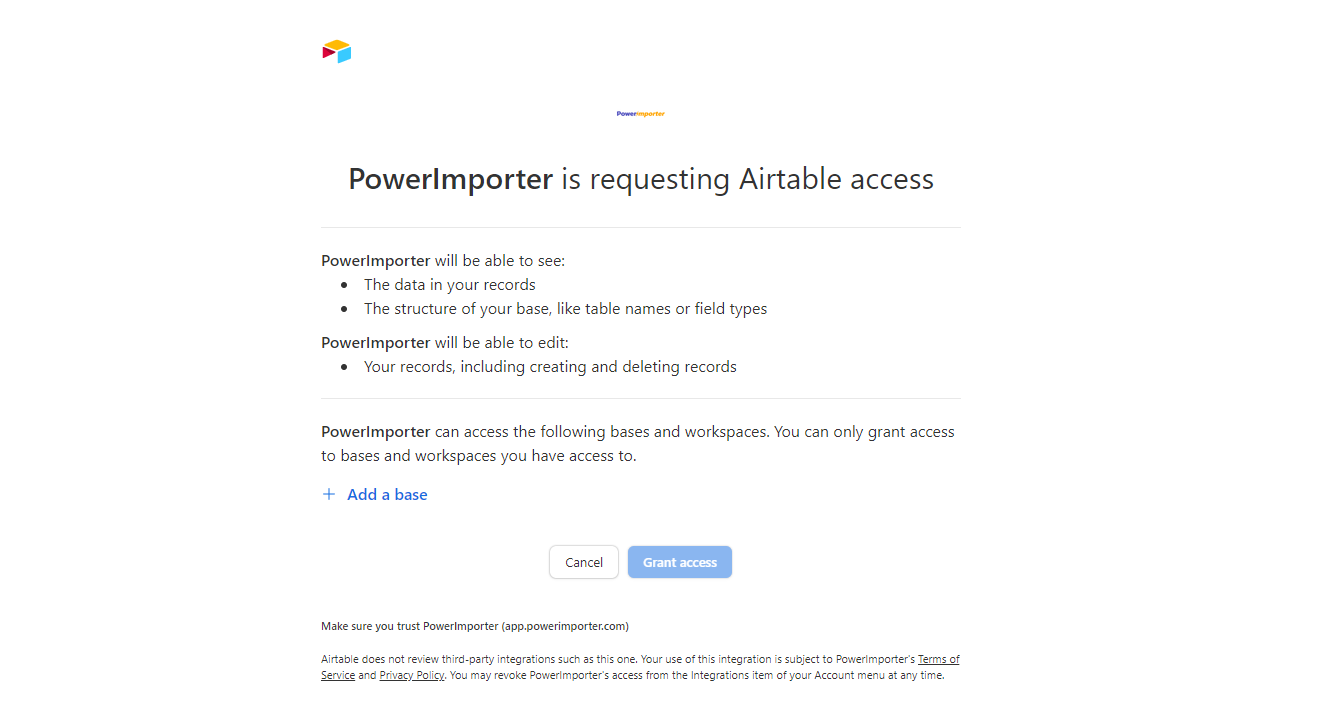
METHOD 2. PERSONAL ACCESS TOKEN
- The second method is by entering a Personal Access token.
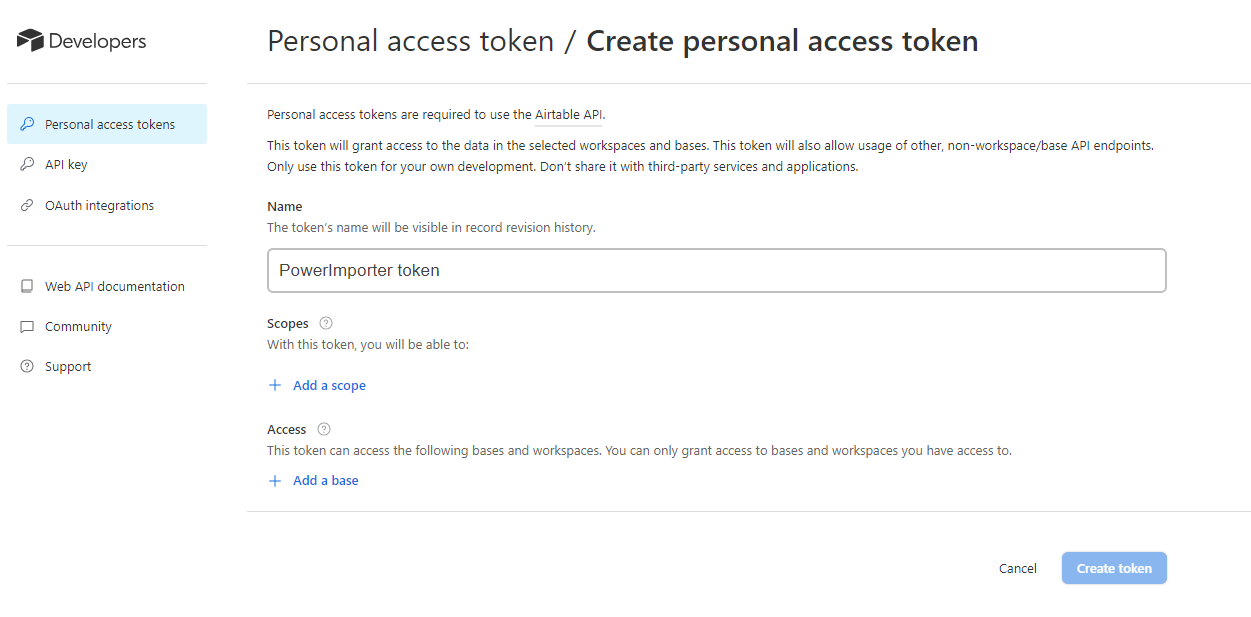
- Go to: https://airtable.com/create/tokens
- Choose a name for your token
- In "Scopes > Add a scope" select the 3 scopes:
+ data.records:read
+ data.records:write
+ schema.bases:read
- In "Access > Add a base", select the base you want to connect
- Click on "Create token"
- Copy the token on that window
- Go back to PowerImporter and paste the copied token into the empty box located under "Airtable personal access token"
- Click on "Save"

STEP 4 CHECK YOUR COLLECTIONS AND FIELDS MAPPING - OPTIONAL
- Once you have connected to Airtable, you will automatically be taken back to Step 5
- A green message wil appear on top of your screen: "Airtable account connected". You can check the name of your Airtable base which will appear next to the Airtable icon.
- We recommend that you double check your Collections and Fields mapping, in Edit > 3. Tables and Edit > 4. Fields
- You can test & review your workflow to be sure it all works fine.
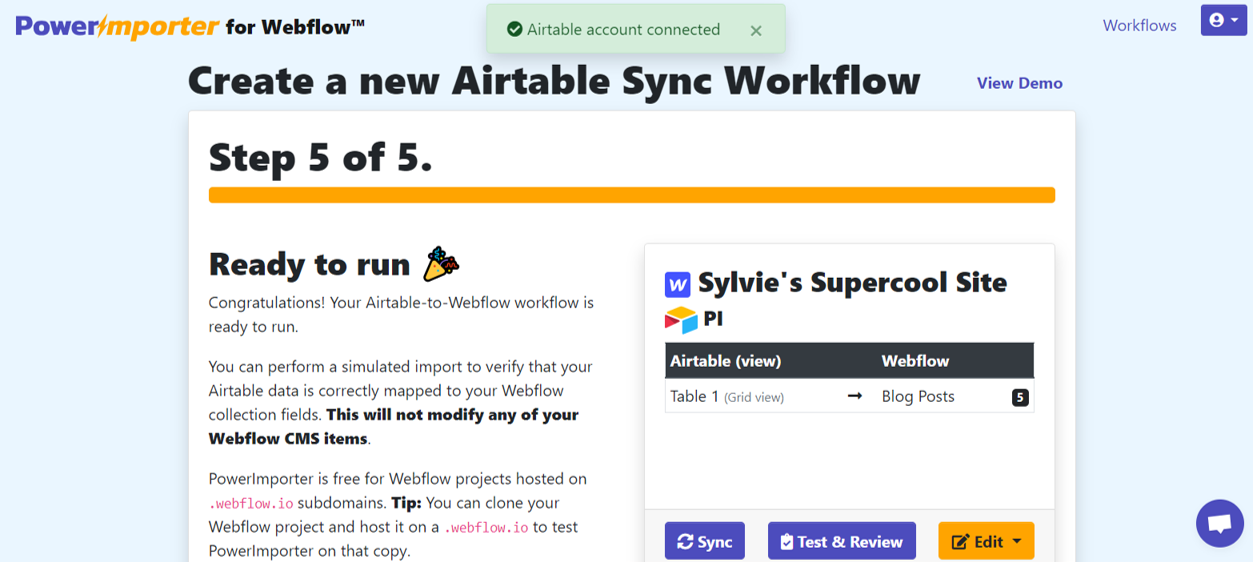
You are done! Repeat this for each Airtable workflow you have in PowerImporter.
Please be aware that while you can make these changes after February 1st 2024, your PowerImporter workflow will cease to sync your data from that date until the update is completed.
Any questions, just email us here:
help@powerimporter.com